Published
- 11 min read
Server monitoring with Hetzner, Terraform, Cloud-Init and Uptime-Kuma

Website Monitoring
If you are running a website and would like to have a general overview of the response times, when it’s offline and to get notified in that case, Uptime-Kuma has got you covered. Follow the link to get convinced by the shiny screenshots, the live online demo and documentation. When convinced, please come back. 🙂
This article combines a couple of topics, that I couldn’t find out of the box covered by another article. It involves Uptime-Kuma, Hetzner-Cloud, infrastructure as code (IaC) with Terraform, Cloud-Init, Bash-Scripting to backup Uptime-Kuma, SSH tunneling, Docker and SQLite.
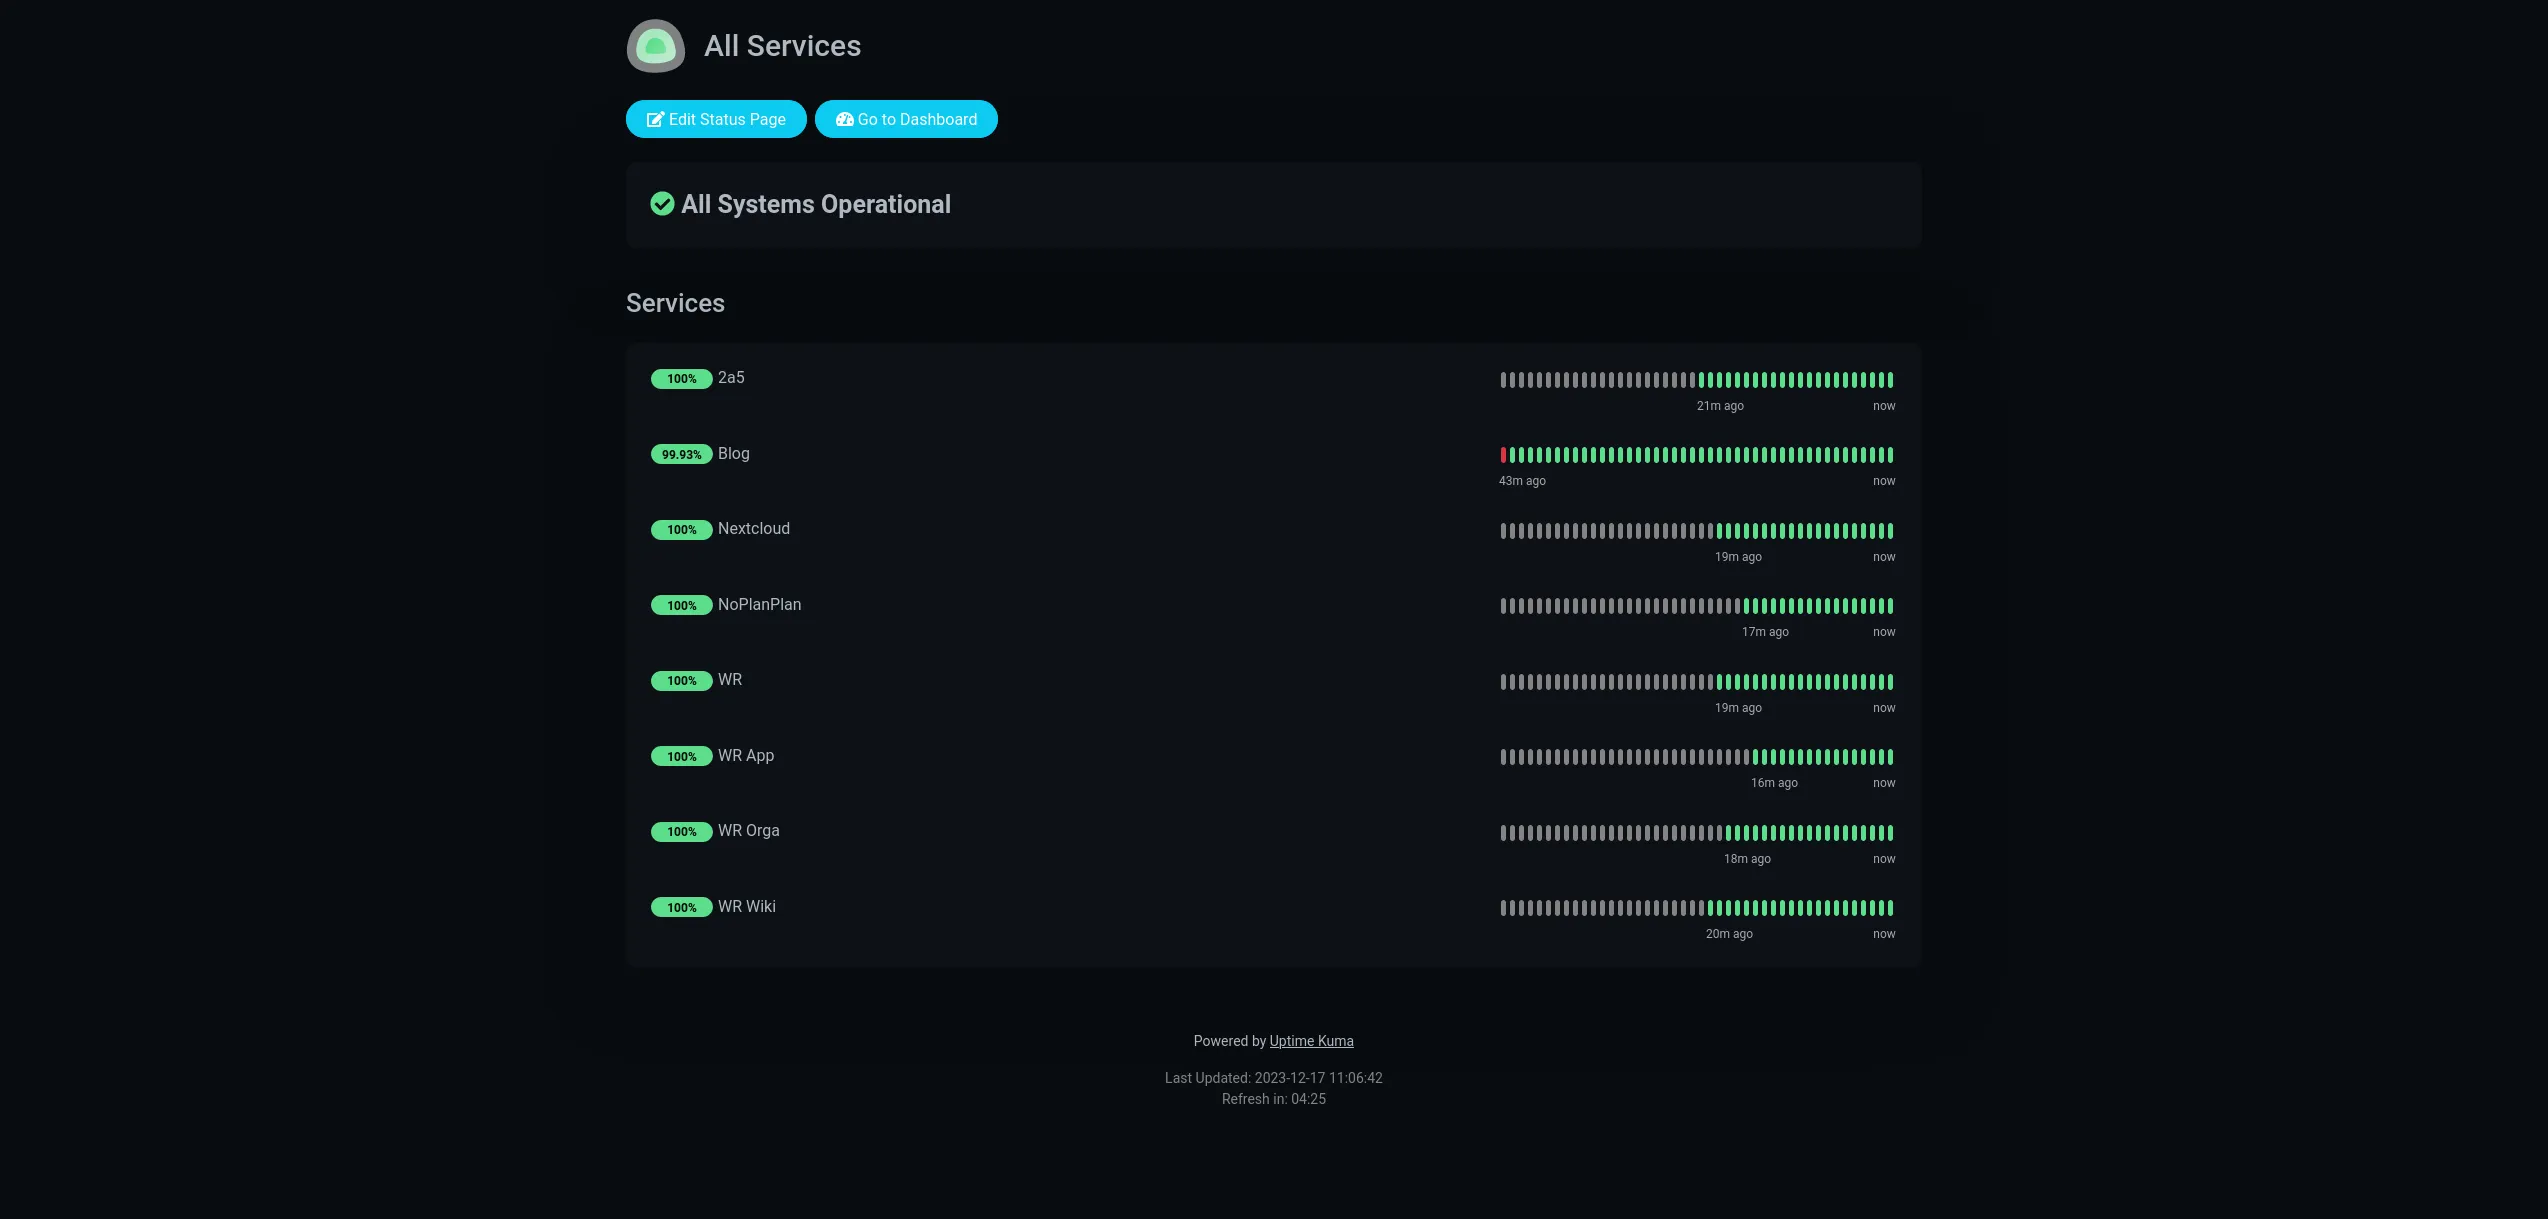
When you are done, you will own the following status page to keep track of all your services:
Functional and Non-Functional Requirements
The tool shall:
- monitor http services and check the response status codes.
- send a notification if the service is responding a certain (bad) status code.
- be deployed via IaC.
- be deployed in the Hetzner Cloud.
- not be exposed to the public.
- provide a visually attractive dashboard.
- keep history for an unlimited time frame.
- notify when a tls certificate is expired.
- keep track of the response times.
Prerequisites
You need:
- A GNU/Linux Desktop. I use Pop!_OS 22.04 LTS. Any other Debian derivative should be good. If you use a RHEL derivative check the Terraform installation manual. The rest will work.
- If you are running Windows the Windows Subsystem for Linux might be something for you.
- If you are running macOS check the Terraform and jq installation manuals how to prepare your system. Bash scripts should be good.
- A working Hetzner-Cloud account.
Prepare your desktop
Install Terraform to deploy IaC and jq, a Command-line JSON processor. Following works on Debian derivatives like Ubuntu 22.04:
       wget -O- https://apt.releases.hashicorp.com/gpg | sudo gpg --dearmor -o /usr/share/keyrings/hashicorp-archive-keyring.gpg
echo "deb [signed-by=/usr/share/keyrings/hashicorp-archive-keyring.gpg] https://apt.releases.hashicorp.com $(lsb_release -cs) main" | sudo tee /etc/apt/sources.list.d/hashicorp.list
sudo apt update && sudo apt install terraform jq
Setup your working directory:
       mkdir hetzner
cd hetzner
touch hcloud.tf
touch variables.tf
Prepare Hetzner
- Enter the Hetzner Cloud Console and create a new project.
- Inside the new project create a new API-Token with read-write permissions.
- Replace TOKEN within the following command with the one you just created and run:
echo "hcloud_token = \"TOKEN\"" > terraform.tfvars. Make sure not to check-in this file to a repository. Keep this secret save!
I could have used the official Hetzner CLI Tool to create the project and API-Token, but that might be a story for another time.
Prepare Terraform
Edit the variables.tf:
       terraform {
  required_providers {
    hcloud = {
      source = "hetznercloud/hcloud"
    }
  }
  required_version = ">= 0.13"
}
Edit the hcloud.tf:
       variable "hcloud_token" {
  sensitive = true
}

provider "hcloud" {
  token = var.hcloud_token
}

resource "hcloud_server" "web" {
  name        = "monitoring"
  image       = "ubuntu-22.04"
  server_type = "cx11"
  location    = "nbg1"
  user_data   = file("user_data.yml")
  provisioner "local-exec" {
    when    = destroy
    command = "./destroy.sh"
  }
}- I have chosen a
locationthat is not hosting my monitoring targets. This way the response times are much more realistic compared to when the monitoring service is sitting in the rack-space right next to the target. user_datadefines the Cloud-Init configuration. Terraform will only make resources available. What happens after that is the playground for other tools. Cloud-Init will run right after the installation of the VM is done and sets up all necessary services like SSH, Docker, configurations and finally starts the monitoring service.- The
local-execprovisioner will invoke adestroy.shscript to backup the monitoring database.
Prepare SSH
Run the following command to generate a new key-pair and follow the instructions. I have created mine in this location: ~/.ssh/hetznermonitoring
       ssh-keygen -t ed25519
Generating public/private ed25519 key pair.
Enter file in which to save the key (/home/sebastian/.ssh/id_ed25519): /home/sebastian/.ssh/hetznermonitoring
Enter passphrase (empty for no passphrase):
Enter same passphrase again:
Your identification has been saved in /home/sebastian/.ssh/hetznermonitoring
Your public key has been saved in /home/sebastian/.ssh/hetznermonitoring.pub
The key fingerprint is:
SHA256:qUQvXNj6vPDNPC72lA5fdSzdpudV+hMKyuD0++j7DO8 sebastian@deskpop
The key's randomart image is:
+--[ED25519 256]--+
|                 |
|       o         |
|      o o        |
|     o + .     o.|
|      = S     o B|
|     . B   o . B.|
|      = B.+ o + +|
|       +o&*. . =.|
|       .+O#E    +|
+----[SHA256]-----+
Print the public key - you will need it later:
       cat ~/.ssh/hetznermonitoring.pub
ssh-ed25519 AAAAC3NzaC1lZDI1NTE5AAAAILf+E0BIluQE9vCUeuvxprOZI4KISYB0v8yoROyckKik sebastian@deskpop
Keep your private key (the one without any file extension) save. Meaning do not copy it anywhere. But do not lose it either. Otherwise you will not be able to connect to your VM anymore as we will restrict password authentication. But this is only bad if you would like to keep your monitoring history.
Prepare Cloud-Init
Create the user_data.yml and paste the public key from the previous step in line 8:
       #cloud-config
users:
  - name: monitoring
    groups: sudo, docker
    sudo: ALL=(ALL) NOPASSWD:ALL
    shell: /bin/bash
    ssh_authorized_keys:
      - ssh-ed25519 AAAAC3NzaC1lZ....0v8yoROyckKik
  - name: kuma
    groups: docker
    shell: /bin/bash
apt:
  sources:
    docker.list:
      source: deb [arch=amd64] https://download.docker.com/linux/ubuntu $RELEASE stable
      keyid: 9DC858229FC7DD38854AE2D88D81803C0EBFCD88
package_update: true
package_upgrade: true
package_reboot_if_required: true
packages:
  - fail2ban
  - ufw
  - ca-certificates
  - curl
  - gnupg
  - docker-ce
  - docker-ce-cli
groups:
  - docker
runcmd:
  - printf "[sshd]\nenabled = true\nbanaction = iptables-multiport" > /etc/fail2ban/jail.local
  - systemctl enable fail2ban
  - systemctl start fail2ban
  - ufw allow 'OpenSSH'
  - ufw enable
  - sed -ie '/^PermitRootLogin/s/^.*$/PermitRootLogin no/' /etc/ssh/sshd_config
  - sed -ie '/^PasswordAuthentication/s/^.*$/PasswordAuthentication no/' /etc/ssh/sshd_config
  - sed -ie '/^X11Forwarding/s/^.*$/X11Forwarding no/' /etc/ssh/sshd_config
  - sed -ie '/^#MaxAuthTries/s/^.*$/MaxAuthTries 2/' /etc/ssh/sshd_config
  - sed -ie '/^#AllowTcpForwarding/s/^.*$/AllowTcpForwarding yes/' /etc/ssh/sshd_config
  - sed -ie '/^#AllowAgentForwarding/s/^.*$/AllowAgentForwarding no/' /etc/ssh/sshd_config
  - sed -ie '/^#AuthorizedKeysFile/s/^.*$/AuthorizedKeysFile .ssh/authorized_keys/' /etc/ssh/sshd_config
  - sed -i '$a AllowUsers monitoring' /etc/ssh/sshd_config
  - passwd -d root
  - su kuma -c "docker run -d --restart=always -p 3001:3001 -v uptime-kuma:/app/data --name uptime-kuma louislam/uptime-kuma:1"
Do not trust the docker key id in line 16. Check yourself by simply running: curl -sL https://download.docker.com/linux/ubuntu/gpg | gpg.
Now run:
       terraform init

Initializing the backend...

Initializing provider plugins...
- Finding latest version of hetznercloud/hcloud...
- Installing hetznercloud/hcloud v1.44.1...
- Installed hetznercloud/hcloud v1.44.1 (signed by a HashiCorp partner, key ID 5219EACB3A77198B)

[...]
Terraform has been successfully initialized!
[...]
I have cropped the blala. All good.
Afterwards run terraform apply to provision your new VM. You need to enter yes when asked. It usually takes 3 to 5 minutes until the process is done, because it updates, upgrades and reboots. And because it’s a very weak/cheap machine.
       terraform apply

Terraform used the selected providers to generate the following execution plan. Resource actions are indicated with the
following symbols:
  + create

Terraform will perform the following actions:

  # hcloud_server.web will be created
  + resource "hcloud_server" "web" {
      + allow_deprecated_images    = false
      + backup_window              = (known after apply)
      + backups                    = false
      + datacenter                 = (known after apply)
      + delete_protection          = false
      + firewall_ids               = (known after apply)
      + id                         = (known after apply)
      + ignore_remote_firewall_ids = false
      + image                      = "ubuntu-22.04"
      + ipv4_address               = (known after apply)
      + ipv6_address               = (known after apply)
      + ipv6_network               = (known after apply)
      + keep_disk                  = false
      + location                   = "nbg1"
      + name                       = "monitoring"
      + rebuild_protection         = false
      + server_type                = "cx11"
      + shutdown_before_deletion   = false
      + status                     = (known after apply)
      + user_data                  = "cKa50g56FS9PVQwvI0mzJ+pmqP8="
    }

Plan: 1 to add, 0 to change, 0 to destroy.

Do you want to perform these actions?
  Terraform will perform the actions described above.
  Only 'yes' will be accepted to approve.

  Enter a value: yes

hcloud_server.web: Creating...
hcloud_server.web: Creation complete after 10s [id=40652036]

Apply complete! Resources: 1 added, 0 changed, 0 destroyed.
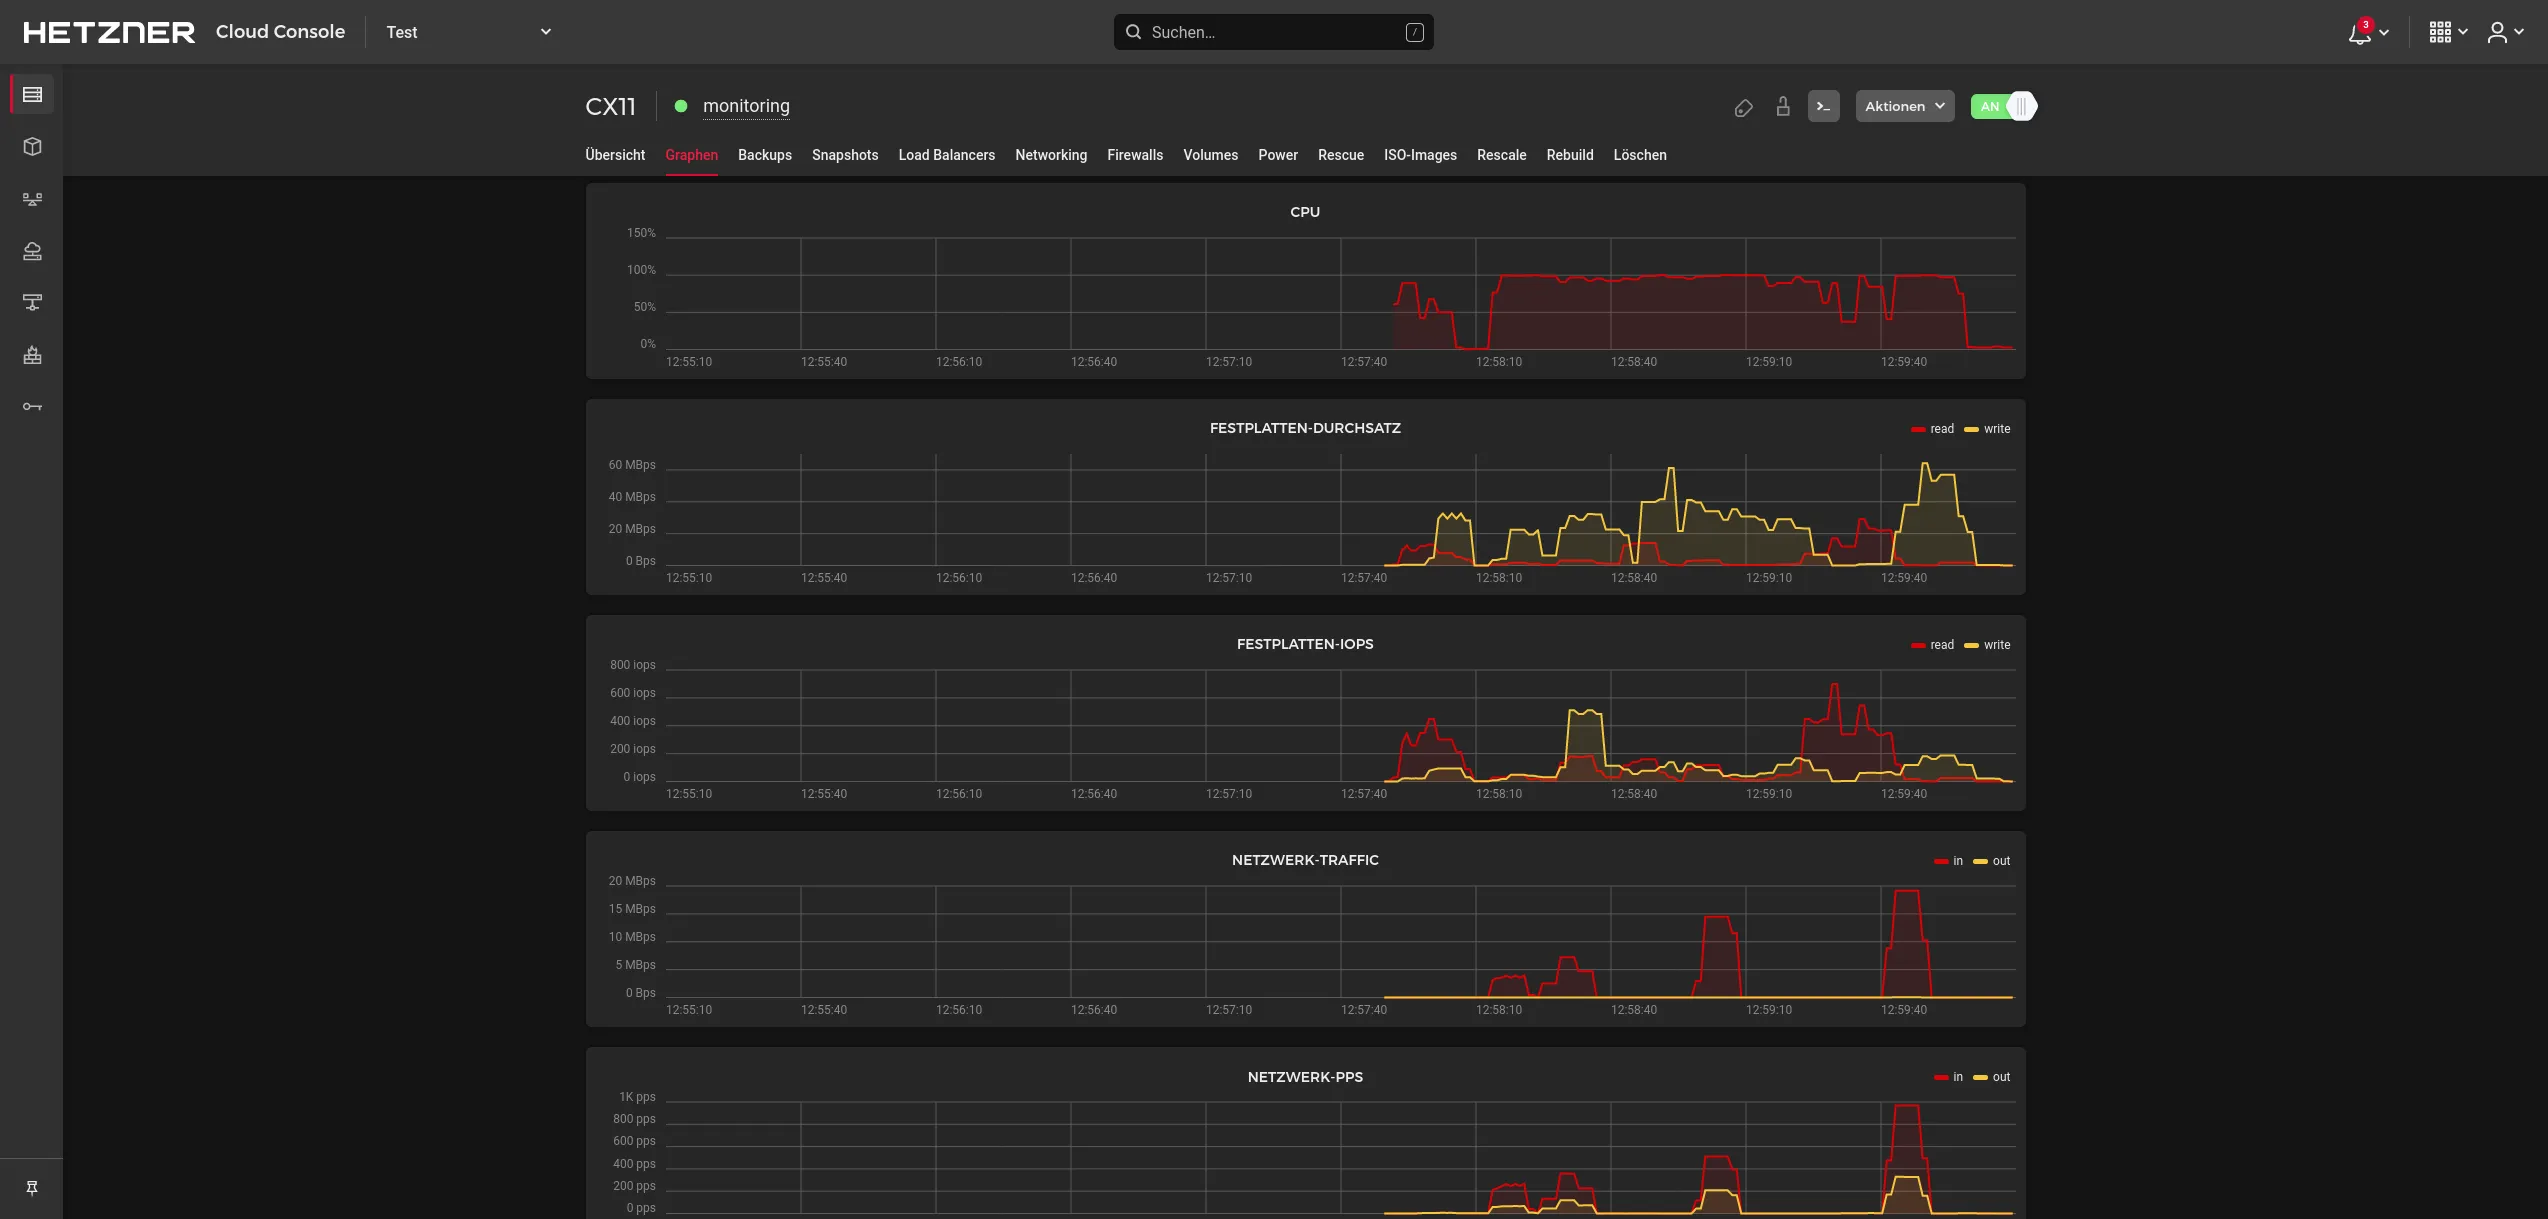
Meanwhile you can watch the utilization graphs. You can tell when it’s done when the CPU idles:
Open an SSH tunnel
Now the Uptime-Kuma service should already be running on your brand new host on TCP-Port 3001. The thing is, that the TCP port 3001 is closed and not exposed to the public for safety reasons. And that’s intended because there is no need to have it public facing. Only I want to have access to it and no one else. Therefore let’s create a small connect script vim connect.sh:
       #!/bin/bash
ip=$(terraform show -json | jq -r ".values.root_module.resources[0].values.ipv4_address")
ssh -N -L 3001:$ip:3001 -i ~/.ssh/hetznermonitoring monitoring@$ip- This is where
jqcomes into play to fetch the given IPv4-Address. - The ssh command opens up a local (-L) tunnel where it connects TCP port 3001 on your localhost with TCP port 3001 on the remote VM by tunneling the traffic through the secure shell (SSH) connection that utilizes TCP port 22 (which is the only exposed port). Without the -N option the terminal would actually connect to the target. Try it out to experience the difference.
Make it executable and run it in the foreground. You will get asked if you accept the VMs public key in combination with the IP address. Answer yes when asked.
       chmod u+x connect.sh
./connect.sh
Are you sure you want to continue connecting (yes/no/[fingerprint])?
Warning: Permanently added '1.1.1.1' (ED25519) to the list of known hosts.
yes
Now you can close the connection by CTRL+C and re-connect in the background ./connect.sh &.
Setup Uptime-Kuma
Now head over to localhost:3001 in your browser, set a username and password. Afterwards add all the sweet services you’d like to monitor. Check out the settings, where you might want to increase the monitor history which is defaulted at 180 days.
I added a telegram bot to get notified if any service does not respond a 2xx status code. Pretty self explanatory.
I discovered a limitation: So far I couldn’t find a notification setting to be notified if the response time is above a certain threshold for a certain amount of time.
A nice option is the certificate expiry notification. If you provision your tls encryption with Let’s encrypt and the Certbot Tool, you might have forgotten to enable the auto-refresh. Or, more unlikely, the service is unavailable or keeps failing to refresh the certificate due to various other reasons.
Close the SSH tunnel
Foreground the background ssh tunnel job with fg 1 and terminate it with CTRL+C.
Backup the database and destroy the server
Uptime-Kuma is running a SQLite in the background and I definitely don’t want to lose it. Therefore I added the following script destroy.sh:
       #!/bin/bash
ip=$(terraform show -json | jq -r ".values.root_module.resources[0].values.ipv4_address")
ssh -i ~/.ssh/hetznermonitoring monitoring@$ip docker stop uptime-kuma
ssh -i ~/.ssh/hetznermonitoring monitoring@$ip sudo cp /var/lib/docker/volumes/uptime-kuma/_data/kuma.db .
scp -i ~/.ssh/hetznermonitoring monitoring@$ip:~/kuma.db .
Make it executable chmod u+x destroy.sh and destroy the server and type yes when asked:
       terraform destroy
hcloud_server.web: Refreshing state... [id=40652036]

Terraform used the selected providers to generate the following execution plan. Resource actions are indicated with the
following symbols:
  - destroy

Terraform will perform the following actions:

  # hcloud_server.web will be destroyed
  - resource "hcloud_server" "web" {
      - allow_deprecated_images    = false -> null
      - backups                    = false -> null
      - datacenter                 = "nbg1-dc3" -> null
      - delete_protection          = false -> null
      - firewall_ids               = [] -> null
      - id                         = "40652036" -> null
      - ignore_remote_firewall_ids = false -> null
      - image                      = "ubuntu-22.04" -> null
      - ipv4_address               = "1.1.1.1" -> null
      - ipv6_address               = "2a01::1" -> null
      - ipv6_network               = "2a01::/64" -> null
      - keep_disk                  = false -> null
      - labels                     = {} -> null
      - location                   = "nbg1" -> null
      - name                       = "monitoring" -> null
      - rebuild_protection         = false -> null
      - server_type                = "cx11" -> null
      - shutdown_before_deletion   = false -> null
      - status                     = "running" -> null
      - user_data                  = "cKa50g56FS9PVQwvI0mzJ+pmqP8=" -> null
    }

Plan: 0 to add, 0 to change, 1 to destroy.

Do you really want to destroy all resources?
  Terraform will destroy all your managed infrastructure, as shown above.
  There is no undo. Only 'yes' will be accepted to confirm.

  Enter a value: yes

hcloud_server.web: Destroying... [id=40652036]
hcloud_server.web: Provisioning with 'local-exec'...
hcloud_server.web (local-exec): Executing: ["/bin/sh" "-c" "./destroy.sh"]
hcloud_server.web (local-exec): uptime-kuma
hcloud_server.web: Still destroying... [id=40652036, 10s elapsed]
hcloud_server.web: Still destroying... [id=40652036, 20s elapsed]
hcloud_server.web: Destruction complete after 23s

Destroy complete! Resources: 1 destroyed.
If everything runs smoothly you should have received the kuma.db file locally.
Restore a backup
When you have destroyed your server and would like to restore the backup, the following script is needed restore.sh:
       #!/bin/bash
ip=$(terraform show -json | jq -r ".values.root_module.resources[0].values.ipv4_address")
ssh -i ~/.ssh/hetznermonitoring monitoring@$ip docker stop uptime-kuma
ssh -i ~/.ssh/hetznermonitoring monitoring@$ip docker container prune -f
scp -i ~/.ssh/hetznermonitoring kuma.db monitoring@$ip:~/
ssh -i ~/.ssh/hetznermonitoring monitoring@$ip sudo cp kuma.db /var/lib/docker/volumes/uptime-kuma/_data/kuma.db
ssh -i ~/.ssh/hetznermonitoring -t monitoring@$ip sudo -u kuma docker run -d --restart=always -p 3001:3001 -v uptime-kuma:/app/data --name uptime-kuma louislam/uptime-kuma:1
Again make it executable chmod u+x restore.sh and run it after terraform apply is done and you have a blank Uptime-Kuma service running.
When done your final file structure should look like this:
       tree -h
[4.0K]  .
├── [ 154]  connect.sh
├── [ 294]  destroy.sh
├── [ 361]  hcloud.tf
├── [228K]  kuma.db
├── [ 516]  restore.sh
├── [1.6K]  terraform.tfstate
├── [ 180]  terraform.tfstate.backup
├── [  82]  terraform.tfvars
├── [1.6K]  user_data.yml
└── [ 130]  variables.tf

0 directories, 10 files
Troubleshooting
- If you have multiple background jobs running, check which one is the correct one with
jobs. - If you connect to the VM, disconnect, destroy and re-create it you might run into an issue where your known_hosts file is prepared with the old public key of your previous VM. Go ahead and delete that entry:
ssh-keygen -f "/home/sebastian/.ssh/known_hosts" -R "1.1.1.1"(Replace the IP with the one Hetzner assigned to your VM). But the ssh command should tell you when this is necessary.
Done
I hope this article has been helpful to you.
Best
Sebastian
Image License
Today’s hero image ”Goddard Monitors Orions EFT-1 Test Flight” by NASA Goddard Photo and Video is licensed under CC BY 2.0.